Categories
Reviews

Update On iRig

iRig

After having used the iRig for two church services this weekend, I wanted to briefly revisit the subject with a few updates on the devices performance.

It was certainly convenient!  I left the musical I was playing, and as I walked into the sanctuary, I plugged in the iRig and turned on the app (you’re supposed to plug it in before launching the app for it to perform correctly), which took about 15 seconds to load.  My phone is an iPhone 4, so it’s pretty “old” and outdated.  I plugged it into the direct box, plugged my guitar into the iRig, and I was ready to go.

Because I was not using an amp, I had to use headphones as in-ear monitors.  Now, this might have worked better if I had nice in-ear monitors… but my headphones are really cute! They’re purple… Anyway, there was a lot of signal degradation between the guitar, phone, iRig, stereo cable, stereo to  1/4″ adapter, direct box, XLR, snake, sound board, ethernet cables, in-ear systems, and my headphones.  So, it’s to be expected.  I had to dig in and play rather aggressively to get a decent sound.  Also, there was almost no sustain.  To keep sound coming, I had to keep playing.

Once the app was running, I could put my phone to sleep, and turn it back on again without needing to re-open the app.  When we finished playing for the first time, I turned on the tuner (because that mutes the sound), and put the phone to sleep.

My Brother and Sister-In-Law came to the Sunday service, and I had asked them to tell me how my guitar sounded out in the congregation.  As I’m sure you all know, the sound you hear on stage is not the sound the audience hears.  Rachel, my Sister-In-Law, who graduated Asbury University with in Vocal Theater Performance and a minor in music told me, “Well, I don’t know what sound you were going for, but it sounded like a guitar!” My brother, Thomas, was a little more helpful.  He has been playing music as long as I have (he’s my go-to keyboard player), but took a different (and more sensible) path in college than I, and knows my tone, and the sound that I like to achieve with my equipment.  He told me the sound was decent, but it was thin, and he could tell it was  processed and digital.

This was what I expected to hear (no pun intended), but I was hoping for a little higher sound quality.  However, I doubt anyone else noticed anything different.  I specifically asked them to listen because I trust their judgement, but I’m not sure they would have noticed if I hadn’t said anything.

All in all, I think it’s a good product as a back up rig/practice tool.

Categories
Reviews

iRig As My Rig?

iRig

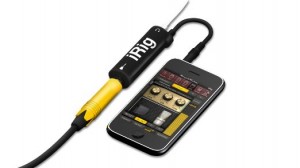
The iRig from IK Multimedia is a compact plug that fits in the 1/8″ headphone jack of an iPhone with a 1/4″ input for your guitar and another 1/8″ output for headphones or other devices.  Along with this plug, you need the iRig app, which comes in a simplified, free version, or and expanded selection of amp and effect pedal models for $19.99.  You can also make in app purchases for specific amps or pedals. The app also works on iPad, and iPod Touch, if that’s what you have.

The App

Being the poor college student that I am, I opted for the free version.  The free app, without any additions, requires a minimum of 270 MB of space, so you might have to delete a few cat memes to make space.  This version comes with one amplifier model, two microphones (which are used on the amp), a distortion pedal, a delay pedal, and a noise filter.  There is a looping drum track (Which I have not used yet), and a recording option, where you can record your guitar and effects you have selected.

The Amp
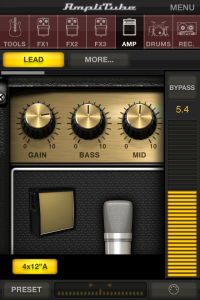
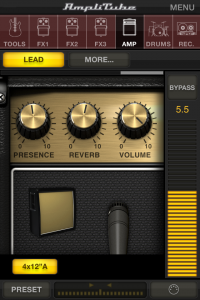
iRig   iRig Amp

On the iPhone, the amplitube controls can be scrolled between and manipulated on the actual knobs on the screen (good luck), or select the knob you want, and use the slider on the right side.  If one were to use an iPad, the whole amplifier would be displayed.  It would be the same with the effects pedals.

The Effects
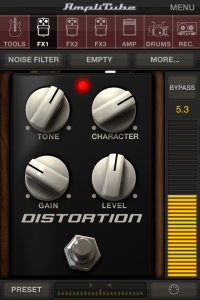
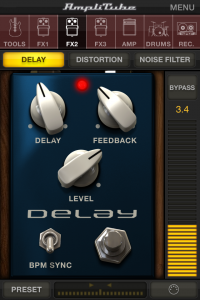
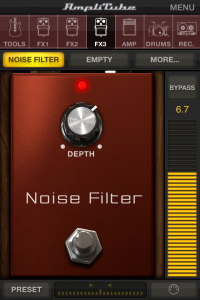
iRigDist.  iRigDelay  iRigFilter

On the iPhone, only one at time is displayed.  The controls work the same way, either by knob or slider on the side.  Up to three effects can be used at a time, and since I only have three, those are the ones I use.  The distortion has a very basic, versatile sound to it.  As you can see from my settings, I have the gain fairly low (there is also gain on the amp) to get a more overdriven sound, rather than a dirtier distortion.  The delay acts as a standard analog delay (but of course, it’s digital), but there is also a switch that you can turn on that will match the BPM from the on board metronome (which can be found in the Tools bar, and you can tap a tempo).  The noise filter is almost essential to using this app.  It does have quite a bit of noise (Distortion not withstanding) and hum if you do not use it.

Recording
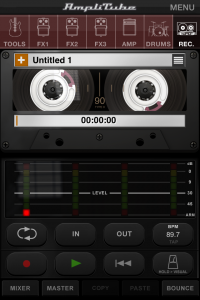
iRigRecord  image_1  image

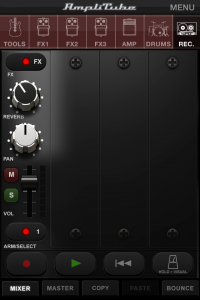
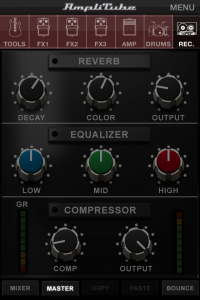
The recording section has multiple screens within itself, the main recording screen, the mixer screen, and the mastering screen.  The audio files you record can be exported, or you can import files to learn songs, etc.  Now, in the spirit of full disclosure, I have only recorded on short little tune.  Which leads me to my first story about the iRig…

I had been messing with the sounds and effects for a little bit, and I had a sound that I was liking.  So, I thought I’d test out the recording function.  I recorded a few scratch tracks, just to get the hang of it, then made a longer recording.  I listen to the track, it sounds pretty good! I go back to playing with the app, and… it’s strictly bypass.  It’s still making sound, but all the effects I was using were just gone.  I checked everything I could think of! The tuner, the metronome, the output,  the input, the amp volume, the pedal volume, different head phones, 1/4″ cable, none of it made a difference.

I finally capitulated, and used the help button on the menu, and send IK Multimedia an email, explaining what my problem was, and what I had tried to do to fix it.  Within 24 hours, they had written me back with several suggestions as to what my problem was.  If you look back at the picture of the Mixer screen (The middle one), you may notice a tiny little red light at the top, left hand side of the screen labeled “FX.”  Apparently I had accidentally brushed this and muted all my effects.  Total user error.  However, the response time of IK was admirable and helpful in helping me fix my issue.

Is It Redundant?

So, why is this little device worth looking at? For a practice amp?  It’s small size and portable, and most people have their phones on them all the time anyway.  Is it inexpensive? Certainly, compared to some effects processors, and it is able to be expanded.  What do I find most useful? Redundancy! Not nearly as cool of an answer as  you thought it was going to be? Let me explain.  This week, I’m playing in a musical for a local high school.  I took my guitar rig, and left it at the school, because I have enough equipment that I don’t want to lug around everyday for rehearsals and show.  But, I’m also playing at my church this weekend.  What should I do? Bite the bullet and pack up after the show to go to church, just to set up, play, and tear it down again to back to the school?  I guess that’s what I’ll have to do… *sigh*… but wait! I know, I’ll use the iRig!  Using the iKlip (also available from IK Media), I strap my phone and iRig plug to a stand, plug it into the P.A. using a stereo cable, and just like that, I have (almost) the same sound!  Is it perfect? Of course not.  I don’t have near the same control as with my normal set-up, nor as good of sound, but most people won’t notice a difference.

As the saying goes, “one is none, and two is one.” I feel that the iRig’s greatest use is as a back-up/supplement.  It’s small enough to go in a gig bag with the stereo cable in case your amp goes out, or to be used in places where space is tight, or a friend who you didn’t know was coming shows up to play, and needs an amp.  It gives you options and allows you to be creative.  On a budget!

It’s also just a cool little piece of gear! Click here to get your own!  http://www.jazzbooks.com/mm5/merchant.mvc?Screen=PROD&Store_Code=JAJAZZ&Product_Code=IRIG&Category_Code=#.VBNclGNApjc

Thanks for reading! As always, please check back for more posts.


Categories
Reviews

Lines Of The Greats

JGL

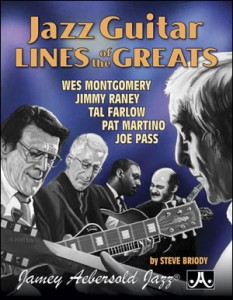
Jazz Guitar Lines Of The Greats by Steve Briody is a large compilation of 675 jazz lines written for reference, learning, and expanding one’s jazz vocabulary.  Taken from the works of Joe Pass, Jimmy Raney, Tal Farlow, Wes Montgomery, and Pat Martino, the lines are meant to inspire jazz musicians at any level.

The use of imitation has been used throughout the entire history of music.  In fact, before the introduction of copyright laws, taking an excerpt from another musicians’ composition or work and implementing it into your own music was not considered “stealing” or a “shortcut,” but was a way of honoring musicians you revered and aspired to be like.

Now, is this book encouraging being a carbon copy of some of these players? Absolutely not.  Even if you were to take these lines, or even a wholly transcribed piece by any jazz musician, and played it yourself, you would still sound like yourself! As Steve Briody says in his introduction;

Work these new ideas and phrases into your own playing.  Don’t worry that you may become a “clone.”  Remember that each of us learned to speak through the means of imitating our parents and siblings — do you speak exactly like them  now? Of course not.  Wes Montgomery, Barney Kessell, Tal Farlow and many other greats were eventually able to develop their individual styles after learning all of Charlie Christian’s solos and licks.  Learn the phrases of your favorite jazz players, get experience playing in jazz groups whenever you can, and your own style will certainly emerge over time.

One of the reasons I named this post “Lines Of The Greats” rather than using the title, “Jazz Guitar Lines Of The Greats” is because these lines are applicable on any instrument.  Randy Brecker says, “Steve Briody’s ‘Jazz Guitar Lines Of The Greats’ is a great reference book for any instrument – a lot of these lines lay quite well on the trumpet and are a great way to expand one’s jazz vocabulary!”  Within reason, music is fairly transferable to most instruments

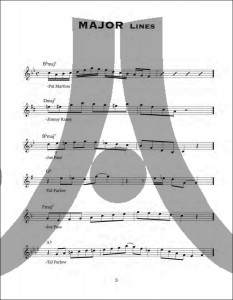
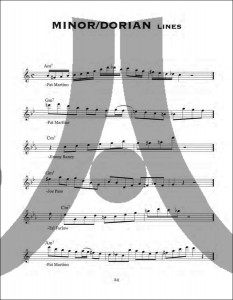
This compilation is broken up into five chapters, each with its own selection of musical gems.  Chapter 1 covers Major lines, chapter 2 covers Minor/Dorian lines, chapter 3 discusses lines than can be used over Major 2-5-1 chord progressions, chapter 4 discusses lines that can be used over Minor 2-5-1 chord progressions, and chapter 5 wraps up with Dominant 7th lines.

Legends such as Pat Metheny and George Benson have referred to jazz as a  “language,” consisting of its own grammar and syntax.  This book provides the guitarist with a substantial amount of “vocabulary words,” and it was a great deal of fun for me, as well as an amazing learning experience, to transcribe and categorize them.

Example of Major lines

Major

Example of Minor Lines

Minor

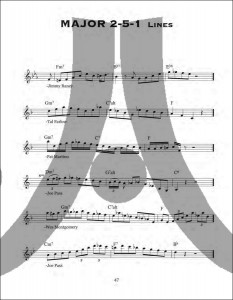
Example of Major 2-5-1 lines

2-5-1

As you can see from the examples above, the format is pretty simple.  Generally 2-4 bar phrases, in standard notation, with the chords the lines go well with written above the staff, with the originating artist credited for their musical lines.

I’ve played through quite a few of these lines, using some of the Aebersold play-a-long tracks, and with the AmpliTube iRig for my phone (Review coming soon!), where I would record myself playing the chords, play it back, and use some of the guitar lines over them.  To say there is an overwhelming amount of information for me would be a slight misrepresentation.  In keeping with the language and vocabulary analogy, we’ll call this book a dictionary.  It’s like I picked up a small dictionary, with a whole bunch of “words” that I wanted to learn, with a very small starting vocabulary.  So, I figured that I would use this book like a jazz lines dictionary.  I’ll use it to learn new “words” and look up new “words” when I want to use them!  Say you were learning a tune, and needed a great line for a specific chord, or chord progression.  You could use this book to look up a great line to “quote” or even just to give you ideas to craft your own line.

This book showcases the chops of many of jazz’s great guitar players and improvisors.  I’m glad to have this book in my musical library to study and reference at any time!


Categories
Reviews

The Improvisors Hall Of Fame

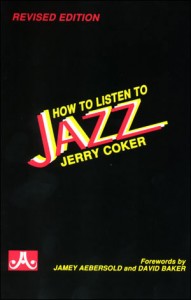
List Taken From “How To Listen To Jazz” by Jerry Coker.

How To Listen To Jazz

Criteria For Appreciation

Jerry Coker uses three different basic approaches for serious jazz listening.  They are as follows:  1. Criticism, 2. Evaluation, and 3. Appreciation, which can be broken down further into Sound, Technique, Time, Tonal Materials, Spirit/Drive, Lyricism, Repertoire, Versatility, & Innovation.  The qualities expressed under Appreciation are what Jerry Coker primarily uses to describe the artists on his list.  The list is in Chronological Order, with the artists nicknames provided as well.

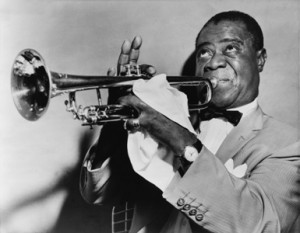
Louis Armstrong, 1900-1971 (Dippermouth, Satchmo, Pops)

Louis_Armstrong_restored

Louis Armstrong has a rather unique position in the Hall of Fame.  His career as a jazz musician started nearly simultaneously with the beginning of recorded jazz.  Also, unlike all the other musicians on this list, Armstrong did not have many predecessors to provide him with inspiration, therefore most of his style had to evolve internally.

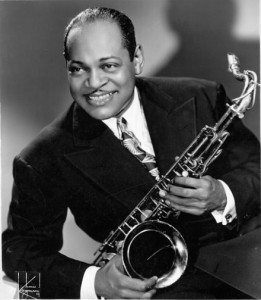
Coleman Hawkins, 1904-1969 (Hawk, Bean)

coleman hawkins

Coleman Hawkins was a contemporary of Louis Armstrong’s, but unlike Armstrong, who’s stylistic developed remained the same from the 30’s, “Hawk” continued to absorb new styles into his playing for the remainder of his life.  He continually showed flexibility when approaching new musical challenges and ideas.

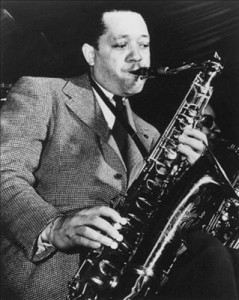
Lester Young, 1909-1959 (Prez)

Lester Young

Some have described Lester Young as a second generation jazz musician.  His style contrasted with early jazz styles, and Young is probably best known for his long-term involvement  with the Count Basie Orchestra.  He was often the featured player, being given multiple solos throughout a tune.

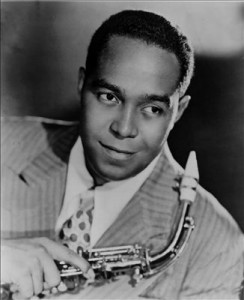
Charles Parker, 1920-1955 (Bird)

Charlie Parker

Jerry Coker writes about Charlie “Bird” Parker,

In this writer’s opinion, as well as the opinion of many others, Charles Parker was the greatest jazz musician who ever lived.  Ironically, his playing career was shorter than that of the other players covered in this chapter.  Bird began making records around 1940, chiefly backing blues singers and playing with large swing orchestras like Jay McShann.  But his major output really began around 1945, when, after a five-year incubation period, he and Dizzy Gillespie unveiled the be-bop style, a style which has continued to be a thriving influence for nearly sixty years!

Miles Davis, 1926-1991

Miles-Davis_320

Miles Davis created an unusually relaxed sound in his playing that was both misunderstood and mimicked by many.  He had to win over his audience with a new sound and technique that made him sound like no-one who came before him, and reportedly, a cool attitude to match. However, when listeners finally did listen to him, they discovered musical purity, economy, and originality.

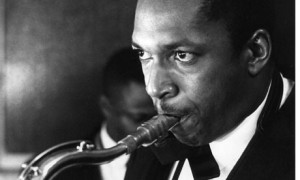
John Coltrane, 1926-1967 (Trane)

John-Coltrane

John Coltrane’s dedication to his music, in both practice and performance, were legendary.  Playing any instrument at Trane’s intensity level was considered a workout in and of itself, especially for brass and woodwind instruments that require the use of stomach muscles to drive air through the instrument.  It is entirely plausible that these tremendous expenditures of energy attributed to the shortening of his life.

There are so many impressive players, each making some sort of contribution to the idiom, that it is difficult to reduce the number to what would be reasonable for the scope of this book and for the capacity of the reader to absorb.


Categories
Reviews

So It Begins! (Part 4)

V01G

Melodic Development-Tension & Release

The ultimate goal of music is to communicate to the listener

When improvising, using the notes of any given scale can usually keep things interesting… to a point.  When playing melodies of any kind, both performers and listeners find that the creation of tension, and the release of that tension, makes for more interesting music.

“Tension” is anything that builds intensity or excitement in music.  It could be a change in volume, use of leading tones, duration of notes played, silence, or many other elements.

However, you shouldn’t overuse tension in your playing.  It’s like the garlic of the musical world.  If you use too much, it’s overpowering and nasty.  But, when used sparingly, it can make your music delicious. I mean food… it can make your food delicious.  Tension is the same way.

An improvised solo should work itself to a tension filled climax, and then release to a finish.  When you listen to skillful jazz players, they will often construct solos and melodies with back-to-back tension and release sections to tie them together.

Tension and Release

The Golden Mean

The diagram above, and the ones that Jamey uses on page 71 of Volume 1, show the “direction” that an optimal solo using tension and release will look like.  This ratio of approximately 2/3 is known as the Golden Mean (also known as the Golden Ratio, Fibonacci Numbers, or the Divine Ratio), and is used in all types of art forms and can be expressed mathematically as well.  Obviously, a ratio is used differently in visual arts, architecture,  or music.  In music, it’s usually a length of time.  Most songs hit their musical climax 2/3 through the tune, or a solo will reach max tension 2/3, and so on.  Most people find things that adhere to this ratio to be inherently beautiful. The Golden Mean has been used throughout history to find the most aesthetically pleasing shapes. The Pyramids in Egypt and the Parthenon in Ancient Greece were built using the Golden Mean.  Plants naturally adhere to this ratio as the most efficient way to grow.  Even the construction of the human body has many visible examples of the Golden Mean.  Observe the length between finger tip to elbow and length between wrist and elbow, or the length of the face and width of the face. I know you tried at least one of those measurements!  While this information is not in Volume 1, it’s something I studied in my music history classes.  I believe that knowing the past helps us going into the future.

One of the simplest things that I have done in my own playing is to play my solo/riff, what-have-you, and then use the leading tone 7th to bring me back to the tonic.  Often I will increase the intensity (physically) of my playing at the end of a solo, and drop off suddenly.  Neither of these techniques are hard or complex, but they add a little bit of interest to the end of these lines and usually sound fairly good.  Every time you use tension, it should feel like it’s going somewhere.  Ideally, each line should sound new and more exciting than the last.  Imagine you’re telling a dramatic tale with your instrument.  You want it to keep getting better and better.

Improvisors should keep in mind the traditional musical sequence, which is as follows:                                  Statement Of Theme >> Development Of Theme >>  Climax >> Release (Relaxation of Tension)

Elements Which Produce Tension

  • Increased Volume
  • Ascending Lines
  • Emphasis On Passing Tones (non-chord/scale tones)
  • Extreme Register Of Instrument
  • Wide Intervals (especially ascending)
  • Repetition (of almost anything)
  • Alternating Directions
  • Jagged Articulations
  • Non-Chord Tones (4ths, 6ths, 7ths, & 9ths)
  • Dramatic Devices (swoops, glissandos, shakes, trills, etc.)
  • Dissonant Harmony

Elements Which Produce Release (Relaxation)

  • Decreased Volume
  • Descending Lines
  • Notes of Longer Duration (quarter-notes, half-notes, whole-notes)
  • Rests (space)
  • Smoothness (legato)
  • Emphasis On Chord Tones (root, 3rd, or 5th)
  • Silence
  • Consonant Harmony

It helps to know in advance when and where you want the melodic line to go.  You can use tension and release to help get you to your musical destination.

Points To Keep In Mind When Improvising

  • Music is communication – improvisation is a special way of communicating.
  • Don’t play everything you know in every solo.
  • Listen to yourself play – develop the idea you just played!
  • Does your playing contain too much tension – too much release?
  • Would you ramble on with words the way you do with notes? (My parents, professors, and employers would probably say, “Yes”)
  • Every time you improvise you have a chance to say something.  Do you?
  • We can usually remember what we just said (verbally).  Can you remember what you just played musically?
  • Your instrument is merely a  means of delivering the thoughts of your mind.
  • Make your melodic lines SING through your instrument.

Conclusion

This blog post will conclude my four week study of Volume 1 for Jazz Guitar.  In no way am I implying that I have mastered everything in the book that I’ve talked about, or even that I’ve written about everything in the book!  This was a quick sprint into the marathon that is learning jazz music.

Hopefully my introduction into jazz guitar has interested, entertained, or amused you (all of thee above?).  Click here to order your own Volume 1 for Jazz Guitar.

Until the next post! Keep practicing!

Coming soon: “How To Listen To Jazz” by Jerry Coker